| Author: | Ahmed Abbas |
IN THIS ARTICLE YOU WILL:
- Get an Overview of Advanced Customization
- Customize Price Element Selectors
- Customize Cart Drawer Selectors
- Understand Code-based Pricing Configs
- Migrate from Code to UI
- Troubleshoot Advanced Issues
- Understand Best Practices
- Edge Cases
Overview
This guide is for advanced users who need to:
-
Customize price element selectors for custom themes
-
Update cart drawer selectors for non-standard implementations
-
Manually configure pricing rules via code (for dynamic logic)
-
Troubleshoot theme-specific issues
Note: If you're using the UI method (recommended), most of this is handled automatically. Only use these customizations if you encounter theme-specific issues.
Customizing Price Element Selectors
Why You Might Need This
The app automatically detects price elements using common CSS selectors. However, if you're using a custom theme or the prices aren't updating correctly, you may need to add custom selectors.
Default Price Selectors
The app looks for these CSS selectors by default:
'.price-item'           // Dawn theme
'.price'                // Generic, many themes
'.product__price'       // Debut, Brooklyn, many others
'.product-single__price' // Product pages (Debut, Brooklyn)
'.product-price'        // Minimal, Supply
'.money'                // Generic price wrapper
'.price__current'       // Some newer themes
'.price__regular'       // Regular price display
'.price__sale'          // Sale price display
'.price-item--sale'     // Dawn theme sale price (for compare-at price products)
These cover 90%+ of Shopify themes. But custom themes may use different selectors.
How to Find Your Theme's Price Selector
-
Open your store in a browser
-
Navigate to a product page
-
Right-click on a price element
-
Select "Inspect" or "Inspect Element"
-
Look for the CSS class name(s) in the HTML
Example:
<span class="custom-price-tag">$29.99</span>
The selector you need is:
.custom-price-tagMultiple elements: If you see multiple price elements (e.g., regular price and sale price), note all their selectors.
How to Add Custom Price SelectorsStep 1: Go to Convert Dashboard
-
Navigate to your Convert account
-
Click on your Experience
-
Go to Experience → Settings → Global JavaScript
Step 2: Add Your Custom Selectors
Add this code to the Global JavaScript section:
// Update these selectors to match your theme's price elements
convert.shopifyPricingTags = convert.shopifyPricingTags || [];
convert.shopifyPricingTags.push(
  '.custom-price-tag',           // Example: Your custom theme
  '.price-display',              // Example: Another custom selector
  // Add more selectors if needed
);
Step 3: Replace Examples with Your Selectors
Replace
.custom-price-tag and .price-display with the actual selectors from your theme.Example:
convert.shopifyPricingTags = convert.shopifyPricingTags || [];
convert.shopifyPricingTags.push(
  '.my-theme-price',
  '.product-cost',
  '.sale-price'
);
Step 4: Save and Test
-
Save the Global JavaScript
-
Clear browser cache (Ctrl+F5 or Cmd+Shift+R)
-
Visit a product page and check if prices update
-
Open console (F12) to see debug logs
Important Notes
Where This Works:
-
 Product pages
 -
Collection pages
-
Search results
-
Home page
-
Cart/Checkout (handled automatically by Cart Transform)
Don't Remove Defaults:
-
Use
.push()to ADD your custom selectors -
This keeps the defaults working for other parts of your store
Multiple Variants:
-
The system automatically handles variant price updates
-
Make sure your selector targets ALL price displays (regular, sale, variant-specific)
Customizing Cart Drawer Selectors
Why You Might Need This
The app automatically refreshes cart drawer prices after product updates. However, custom themes may use non-standard cart drawer implementations.
Note: This is only needed if you notice cart drawer prices not updating after adding a product to cart.
Default Cart Drawer Selectors
The app looks for these selectors by default:
'cart-drawer'           // Dawn theme (web component)
'.cart-drawer'          // Class-based
'#cart-drawer'          // ID-based
'.drawer--cart'         // Debut theme
'.mini-cart'            // Brooklyn, Minimal
'.ajax-cart'            // Venture, Supply
'.cart-popup'           // Some custom themes
'[data-cart-drawer]'    // Data attribute pattern
'.side-cart'            // Custom implementations
'#CartDrawer'           // Debut/Brooklyn
'.cart__sidebar'        // Some themes
These cover most Shopify themes, including Dawn (Shopify's default).
How to Find Your Theme's Cart Drawer Selector
-
Open your store in a browser
-
Add a product to cart (this opens the cart drawer)
-
Right-click on the cart drawer element
-
Select "Inspect" or "Inspect Element"
-
Look for the wrapper element's class or ID
Example:
<div class="my-custom-cart-drawer">
  <!-- cart items here -->
</div>
The selector you need is:
.my-custom-cart-drawerHow to Add Custom Cart Drawer SelectorsStep 1: Go to Convert Dashboard
-
Navigate to your Convert account
-
Click on your Experience
-
Go to Experience → Configuration → Global JavaScript

Step 2: Add Your Custom Selectors
Add this code to the Global JavaScript section (below the price selectors):
// Update these selectors to match your theme's cart drawer
convert.shopifyCartDrawerTags = convert.shopifyCartDrawerTags || [];
convert.shopifyCartDrawerTags.push(
  '.my-custom-cart-drawer',      // Example: Your custom theme
  '#custom-cart',                // Example: ID-based selector
  // Add more selectors if needed
);
Step 3: Replace Examples with Your Selectors
Replace
.my-custom-cart-drawer with the actual selector from your theme.Example:
convert.shopifyCartDrawerTags = convert.shopifyCartDrawerTags || [];
convert.shopifyCartDrawerTags.push(
  '.theme-cart-sidebar',
  '#my-cart-drawer'
);
Step 4: Save and Test
-
Save the Global JavaScript
-
Clear browser cache
-
Add a product with pricing rules to cart
-
Check if cart drawer shows correct prices
-
Open console (F12) to see if cart refresh is triggered
Known Limitation: Cart Drawer Auto-Refresh
-
Cart drawer automatically refreshes to show correct prices
-
No customer action needed
-
Works seamlessly
-
Cart drawer automatic refresh not yet fully supported
-
Customers see correct prices once they reach checkout
-
Cart drawer prices correct on next page load
Recommendation: If cart drawer consistency is critical and you frequently update pricing rules, consider using Dawn theme or a Dawn-based theme.
Code-Based Pricing Configuration (Advanced)
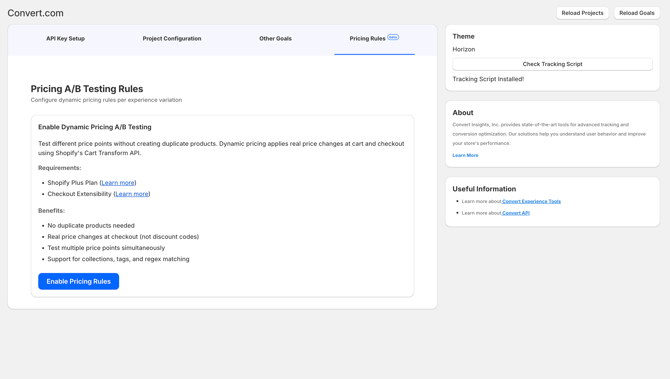
Skip this section if you're using the UI method (recommended).
When to Use Code-Based Configuration
Use manual code configuration only if you need:
-
Dynamic pricing logic (e.g., based on time of day, user properties)
-
Runtime conditions (e.g., if cart value > $100, apply discount)
-
Complex calculations that can't be expressed in the UI
For 95% of use cases, the UI method is simpler and sufficient.
Step 1: Add Global JavaScript (One-Time Setup)
1. Go to Convert Dashboard:
-
Navigate to your Experience
-
Go to Experience → Settings → Global JavaScript
2. Add this code:
// Price element selectors (add custom selectors if needed)
convert.shopifyPricingTags = convert.shopifyPricingTags || [];
convert.shopifyPricingTags.push(
  '.price-item',           // Dawn theme
  '.price',                // Generic, many themes
  '.product__price',       // Debut, Brooklyn, many others
  '.product-single__price', // Product pages
  '.product-price',        // Minimal, Supply
  '.money',                // Generic price wrapper
  '.price__current',       // Some newer themes
  '.price__regular',       // Regular price display
  '.price__sale',          // Sale price display
  '.price-item--sale'      // Dawn theme sale price
  // Add custom selectors here if needed
);

// Cart drawer selectors (add custom selectors if needed)
convert.shopifyCartDrawerTags = convert.shopifyCartDrawerTags || [];
convert.shopifyCartDrawerTags.push(
  'cart-drawer',
  '.cart-drawer',
  '#cart-drawer',
  '.drawer--cart',
  '.mini-cart',
  '.ajax-cart',
  '.cart-popup',
  '[data-cart-drawer]',
  '.side-cart',
  '#CartDrawer',
  '.cart__sidebar'
  // Add custom selectors here if needed
);
3. Save the Global JavaScript
Step 2: Configure Pricing Rules in Variation JS
For each variation (except Original/Control), add pricing rules.
Go to Variation JS
-
Navigate to your Experience
-
Click on the Variation (e.g., "Variation 1")
-
Go to Variation JS section

Add Pricing Rules
Basic Example:
// Shopify Pricing Rules
convertShopify.addPricingRules(convertContext, [
  {
    "type": "percentage",     // or "fixed"
    "value": -10,            // negative for discount, positive for increase
    "match": [
      {"field": "7211428872277", "regex": null},           // Product ID
      {"field": "awesome-cotton-tshirt", "regex": null}    // Product Handle
    ]
  }
]);
Rule Format Explained
Type:
-
"percentage"- Percentage-based adjustment (-10 = 10% off) -
"fixed"- Fixed amount adjustment (-5.00 = $5 off)
Value:
-
Negative values = discount
-
Positive values = price increase
Match Array:
-
Each object represents an identifier
-
field- The identifier value (product ID, handle, SKU, collection, tag) -
regex- Set tonullfor exact match, or a regex pattern for pattern matching
Advanced Examples
Example 1: Multiple Products with Same Discount
convertShopify.addPricingRules(convertContext, [
  {
    "type": "percentage",
    "value": -15,
    "match": [
      {"field": "product-handle-1", "regex": null},
      {"field": "product-handle-2", "regex": null}
    ]
  },
  {
    "type": "percentage",
    "value": -15,
    "match": [
      {"field": "product-handle-3", "regex": null}
    ]
  }
]);
Example 2: Regex Pattern Matching
convertShopify.addPricingRules(convertContext, [
  {
    "type": "percentage",
    "value": -20,
    "match": [
      {"field": "any", "regex": "^SHIRT-.*"}  // All products starting with "SHIRT-"
    ]
  }
]);
Example 3: Collection-Based Pricing
convertShopify.addPricingRules(convertContext, [
  {
    "type": "percentage",
    "value": -10,
    "match": [
      {"field": "collection:summer-sale", "regex": null}  // All products in "summer-sale" collection
    ]
  }
]);
Example 4: Tag-Based Pricing
convertShopify.addPricingRules(convertContext, [
  {
    "type": "fixed",
    "value": -5.00,
    "match": [
      {"field": "tag:vip", "regex": null}  // All products with "vip" tag
    ]
  }
]);
Example 5: Multiple Rules (Different Products)
convertShopify.addPricingRules(convertContext, [
  {
    "type": "percentage",
    "value": -10,
    "match": [
      {"field": "collection:summer-sale", "regex": null}
    ]
  },
  {
    "type": "fixed",
    "value": -5.00,
    "match": [
      {"field": "tag:vip", "regex": null}
    ]
  }
]);
Note: When a product matches multiple rules, they're combined using the Sequential strategy by default. To change this, use the UI Settings (code-based strategy selection not available).
Step 3: Dynamic Pricing Logic (Advanced)
You can add conditional logic for dynamic pricing:
// Example: Time-based pricing
const currentHour = new Date().getHours();
const isHappyHour = currentHour >= 14 && currentHour < 17; // 2pm-5pm

if (isHappyHour) {
  convertShopify.addPricingRules(convertContext, [
    {
      "type": "percentage",
      "value": -25,  // 25% off during happy hour
      "match": [
        {"field": "collection:all", "regex": null}
      ]
    }
  ]);
} else {
  convertShopify.addPricingRules(convertContext, [
    {
      "type": "percentage",
      "value": -10,  // Regular 10% off
      "match": [
        {"field": "collection:all", "regex": null}
      ]
    }
  ]);
}
Important: Dynamic logic runs in the browser, so be careful with complex calculations that could slow down page load.
Migrating from Code to UI
If you're currently using code-based configuration and want to switch to the UI method:
Migration Steps
-
Go to Shopify Admin → Apps → Convert → Pricing Rules tab
-
Select your Experience and Variation
-
Look at your existing Variation JS code
-
For each rule, translate it to the UI:
Code to UI Translation:
|
Code
|
UI Selection
|
{"field": "product-handle", "regex": null} |
Match Type: Specific Product, search for the product
|
{"field": "any", "regex": "^SHIRT-.*"} |
Match Type: Regex Pattern, Pattern:
^SHIRT-.* |
{"field": "collection:summer-sale", "regex": null} |
Match Type: Collections, select "summer-sale"
|
{"field": "tag:vip", "regex": null} |
Match Type: Product Tags, select "vip"
|
-
Add rules via the UI using the translation above
-
Click "Save All Rules" - this automatically updates your Variation JS
-
Test to ensure pricing still works
-
(Optional) Remove old manual code from Variation JS if fully migrated
Advantages of UI Method
-
Single Source of Truth: Rules stored in Variation JS at Convert side
-
Auto-Managed Code: UI generates and updates code for you
-
Auto-Tagging: Experiences tagged with
works-with-convert-shopify-app -
All Identifiers: System includes ID, handle, collections, tags automatically
-
Strategy Selection: Easily choose how multiple rules combine
-
No Coding Required: Visual interface for non-technical users
Troubleshooting Advanced Issues
Problem: Custom theme prices not updating
Solution:
-
Verify selectors:
-
Open console (F12)
-
Look for: No price elements found with selectors: [...]
-
If you see this, your custom selectors aren't matching
-
-
Inspect the price element:
-
Right-click price → Inspect
-
Copy the exact class or ID
-
Add to
convert.shopifyPricingTags
-
-
Check selector syntax:
-
Classes start with
.(e.g.,.price-tag) -
IDs start with
#(e.g.,#product-price) -
Data attributes use brackets (e.g.,
[data-price])
-
Problem: Cart drawer not refreshing
Solution:
-
Verify Dawn theme status:
-
Dawn theme: Should work automatically
-
Other themes: May require custom implementation
-
-
Add custom cart drawer selectors:
-
Follow "Part 2: Customizing Cart Drawer Selectors" above
-
Inspect your cart drawer element
-
Add the selector to
convert.shopifyCartDrawerTags
-
-
Known limitation:
-
Non-Dawn themes may not support automatic refresh yet
-
Checkout will always show correct prices
-
Cart drawer corrects on next page load
-
Problem: Prices flickering on page load
Causes:
-
Theme loads prices before Convert tracking script runs
-
Late-loading price elements
Solutions:
-
Built-in retry logic: The system already includes retry logic for late-loading prices
-
Contact Convert support: If flickering persists, it's likely theme-specific. Provide:
-
Theme name
-
Video/GIF showing the flicker
-
Browser console logs
-
-
Potential custom fix: Convert support can provide theme-specific CSS to hide prices until updated
Problem: Code-based rules not applying
Check these:
-
Syntax errors:
-
Open browser console (F12)
-
Look for JavaScript errors in red
-
Check for missing commas, brackets, quotes
-
-
Variable names:
-
Must use
convertShopify.addPricingRules() -
Must pass
convertContextas first parameter
-
-
Rule format:
-
typemust be"percentage"or"fixed"(lowercase, quotes) -
valuemust be a number (no quotes) -
matchmust be an array of objects
-
-
Variation JS location:
-
Code must be in Variation JS, not Global JS
-
Each variation needs its own rules
-
Original/Control variation should have NO code
-
Problem: Debug logs not showing
Solution:
-
Enable verbose console logs:
-
Open browser console (F12)
-
Refresh the page
-
Look for messages starting with or
-
-
If still not showing:
-
Verify Convert tracking script is loaded
-
Check that your experience is active
-
Verify you're bucketed into a variation (not Original)
-
-
Console log format:
Best Practices for Advanced Users
1. Always Test in Staging First
-
Use a test/dev store
-
Verify all page types (product, collection, checkout)
-
Test multiple products and variants
-
Check browser console for errors
2. Keep Custom Selectors Minimal
-
Only add selectors you actually need
-
More selectors = slightly slower DOM queries
-
Test after adding each new selector
3. Document Your Customizations
-
Keep a list of custom selectors you added
-
Note which theme version you're using
-
This helps when updating themes or troubleshooting
4. Monitor After Theme Updates
-
Shopify theme updates can change CSS selectors
-
Test pricing after every theme update
-
Update
convert.shopifyPricingTagsif needed
5. Use UI Method When Possible
-
Even advanced users benefit from UI simplicity
-
Reserve code-based method for truly dynamic logic
-
Easier maintenance and troubleshooting
Edge Cases & Important Considerations
Abandoned Cart Emails During Tests
The Issue: When you pause/complete a pricing test, customers who abandoned carts might return via email and see a price mismatch.
Recommendation: Consider disabling abandoned cart emails during active pricing tests.
How to disable:
-
Shopify Admin → Settings → Checkout
-
Scroll to Abandoned checkouts emails
-
Uncheck "Send abandoned checkout emails automatically"
Re-enable after: Once test completes and you implement the winning price.
Why this matters: Cart attributes preserve test prices even after test ends, so checkout shows old price while product page shows new price.
Alternative: Accept that a small % of customers might see price differences, but checkout always honors the cart attribute price.
Compare-At Prices (Sale Pricing)
How it works:
-
The app updates both regular and sale prices
-
Compare-at prices automatically adjust based on the new price
-
Uses
.price-item--saleand similar selectors
Custom themes:
-
If your theme uses custom compare-at price elements, add their selectors to
convert.shopifyPricingTags
Multi-Currency Stores
Compatibility: The pricing system works with multi-currency setups.
Important:
-
Fixed amount discounts use the store's base currency
-
Percentage discounts work across all currencies
-
Checkout pricing (Cart Transform) handles currency conversion automatically
Recommendation: Use percentage discounts for international stores to avoid currency conversion issues.
Need Help?
For advanced customization support, contact Convert with:
-
Theme name and version
-
Custom selectors you tried
-
Browser console logs (with errors if any)
-
Screenshots of the issue
-
Your Experience ID
Our team can provide theme-specific guidance and custom solutions.