THIS ARTICLE WILL HELP YOU:
- Introduction
- How GDPR & ePrivacy influence tracking
- Integrate Convert with CMP
- Step 1 - Create a CMP account and add your domain
- Step 2 - Build your own cookie consent banner exactly the way you want it
- Step 3 - Insert the Civic scripts on your website
- Step 4 - Insert the Convert script on your website
- Step 5 - Create an A/B Experience to modify consent banner design
- Step 6 - Define your goals and what you want to measure
- Step 7 - Run the A/B Experience
- Step 8 - Exclude Visitors who selected No Consent
- Step 9 - IAB Consent Framework and Google Consent Mode
No personal data is used or stored in Convert Experiences if you use the default settings.
Introduction
To comply with the GDPR and ePrivacy Convert's EU customers as well as non-EU customers processing personal data of visitors from EU/EEA have to respect the user's choice with respect to cookie tracking. This means that the website owner needs the ability to control when a cookie-setting script is executed on the website.
This is required as the GDPR and ePrivacy state that the website owner is required to block cookie-setting script until they have collected consent from the user.
Compliant use of cookie tracking can be achieved by first executing cookie setting scripts after the user has given their consent.
How GDPR & ePrivacy influence tracking
Under GDPR and ePrivacy, you need to notify your customers about what personal data you are processing through a privacy notice and also need to collect consent for processing this personal data. You can collect consent by using one of the Cookie Consent Management Platforms (CMP) (Cookiebot, OneTrust, CookieConsent, CookieInformation, UniConsent, ConsentManager, Civic Cookie Control) for tracking the visitor by adding a “tracking consent” notice on your webpages. This notice should contain a button that the visitor can click to give their consent.
From a user perspective, a CMP is a tool that enables the pop-up boxes on many of the websites you visit. For each visit, the CMP asks for the user’s consent to data collection and cookie placement. Upon the consent selection by the user, the CMP is then providing an indicator that can be used to conditionally execute (fire) tags – resulting in cookie placement and data collection.
The style of pop-up box displayed, language used for consent, and granularity of options will depend upon the use and configuration of the CMP. By optimizing the combination of these factors, an organization can maximize the proportion of consenting users (allowing you to collect data about their behavior and place cookies for advertising). This is referred to as Consent Rate Optimization.
One common complaint about CMPs is that there is no native functionality within the platforms to test the user behavior when presented with various options for banner configuration. For example – do more users accept consent when presented with a small banner at the top of a webpage, or when presented with a full-screen message?
Integrate Convert with CMP
To address this deficiency, we are presenting below a custom configuration of A/B testing using Civic Cookie Control banner deployed through Convert. With this configuration, you will be able to answer the following questions:
- How many users arrived on the website? Which consent option were they presented with, and did they consent or not?
- How many users consented or rejected with each consent type?
- What is the potential traffic loss or visibility loss from users that don’t consent with each consent type?
- How are other top-line metrics such as pageviews, bounce rate, etc. impacted by the consent experience?
- What is the percentage of Consent Rate Optimization?
For the sake of this article we are going to use Civic Cookie Control as the CMP and describe how this is feasible with Convert.
Step 1 - Create a CMP account and add your domain
Sign up to create a Civic Cookie Control account. Log in to your account and add your website domain name(s). Save. The website will now be scanned (please allow up to 24 hours for the scan to complete).
Step 2 - Build your own cookie consent banner exactly the way you want it
With a Pro Civic subscription you can easily style the banner using the built-in customizable properties. With this you can build your banner using HTML, CSS and Javascript and applying your own logic. All of the properties may be considered entirely optional, as Cookie Control will use sensible defaults for any property not present in your configuration - this means you only need to include those you wish to overwrite. You should choose this option only if you have coding skills.
Step 3 - Insert the Civic scripts on your website
You will need to include both the Cookie Control module, and your own configuration at an appropriate place in your document.
The Cookie Control script looks like this:
<script src="https://cc.cdn.civiccomputing.com/9/cookieControl-9.x.min.js" type="text/javascript"></script>
Then you define (and create) your own configuration as a JavaScript Object, containing as many properties as you deem necessary. To get started, detail both the apiKey and product type you have registered for; and then run Cookie Control's load() function to invoke them.
Step 4 - Insert the Convert script on your website
Use these instructions to install the Convert tag on your site.
Step 5 - Create an A/B Experience to modify consent banner design
Next you need to setup an A/B experience through your Convert account.
In the variation, either by using the Visual Editor or the Custom HTML/JS/CSS editors you will be able to change the design of the consent banner.
You may test any variable that may impact the "conversion rate" for accepting cookies, including:
- Presentation (popup/lightbox vs accordion)
- Copy (tone, length, motivators / value props for accepting cookies, headline)
- Calls to action (label, size, style, color, placement)
- Point-of-action assurance (copy, motivators)
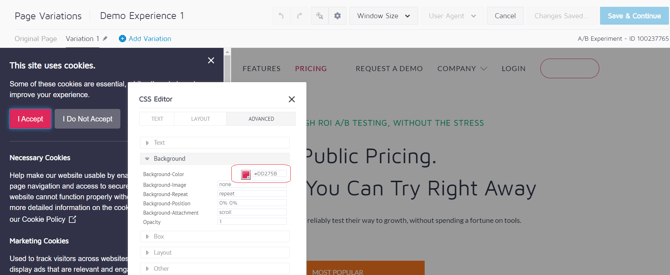
To change the colors:
- You can change the colors by clicking on any element of the banner and then use the CSS Editor.
- Choose the color you like – either by clicking anywhere on the color palette or by entering a HEX code.
- Click ‘Save changes’ to apply the chosen color.
- Preview the styling to see what it would look like on your website
- If you are happy with the styling, save and continue.
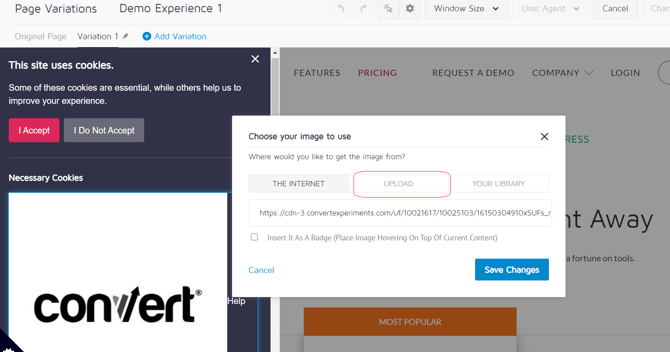
To customize or add a logo:
- Decide if you want to display a logo on the cookie consent banner or not
- Use your own logo. Use an image/logo from the internet or select a file to upload
- Save your changes
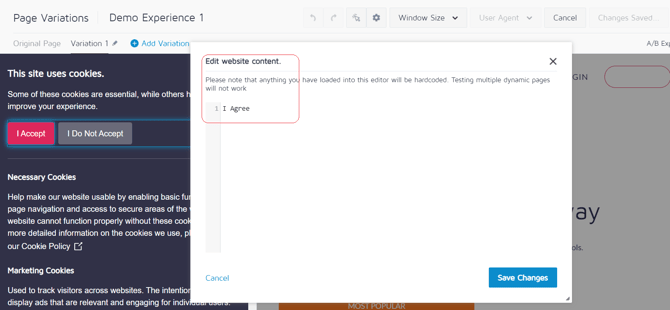
To change the consent options:
- Decide which are the words you would like to use for Consent/Agree - No Consent/Disagree by following GDPR principles for consent
- Preview the styling to see what it would look like on your website
- If you are happy with the styling, save and continue.
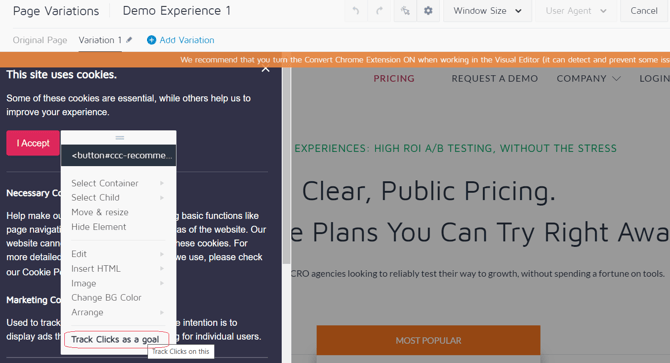
Step 6 - Define your goals and what you want to measure
You can now define your own goals and what you want to measure.
For example you can measure how many visitors clicked on the "I Accept" option of the consent banner while you changed its color:
You can also add goals to measure which visitors have consented to all cookies and which of them have consented only to Necessary. This can be done by using the Advanced Goal Editor and add your own JS conditions there.
Step 7 - Run the A/B Experience
Once you are ready with all changes you can activate the experience and wait for the results. Use our A/B Testing Statistical Calculator to answer all you pre- and post-analysis questions.
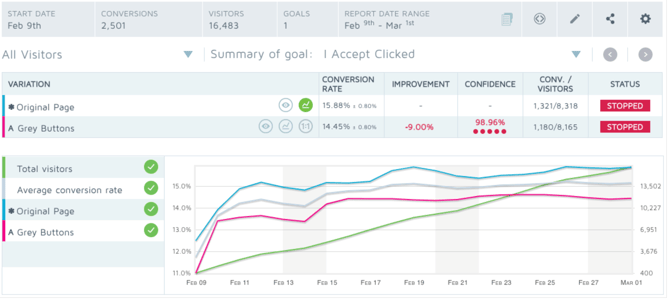
Below for example the hypothesis was that uniformizing the colors (having both button gray) would not change users' behavior, but it ended up doing so. We observed a statistically significant dip of -9%, at a 99% confidence level and a power of 72%.


Step 8 - Exclude Visitors who selected No Consent
In the above A/B experience you need also to take care of visitors who selected No on the cookie consent banner and accepted only the Strictly Necessary cookies. In such case there are some challenges:
- Allowing experience users to opt out of testing and analytics cookies means no tracking after the conversion event (in this case opt in, out or abandonment)
- If users opt out, you are expected to honor their request forever. Allowing them to opt out before you absolutely have to ask means losing out on data and disabling site features that could improve conversion rates
- If running a cookie permission test concurrently with other tests, it's not guaranteed the tests will play nicely together.
- This type of test may have a short half-life, meaning that consumer behavior is expected to change over time. As people get used to encountering permission requests, they are likely to become more tolerant, and respond to prompts differently than today.
Civic Cookie Control has a function called "onRevoke" which you can use and disable this single A/B experience for non consented users by using the parameter "_conv_eignore". For example once a visitor navigates to your page and select the No option on cookie consent banner you can have this:
http://www.convert.com/page1.html?_conv_eignore=experienceID
This would disable any variations showing and collecting any experiment data.
Step 9 - IAB Consent Framework and Google Consent Mode
Civic Cookie Control offers support for the IAB Transparency and Consent Framework (TCF v2.0), should the property iabCMP be enabled. This effectively turns Cookie Control into an IAB registered Consent Management Provider (CMP), where the panels in Cookie Control's settings allow users to access information about IAB registered vendors and control the purposes and features that a vendor wishes to leverage. When using Civic Cookie banner with the IAB TCF v2.0 integration framework enabled, a number of IAB compliance policy rules are enforced on the banner that will be shown to your visitors. This can result in a difference in the appearance of the consent banner configured in your Civic account and the consent banner shown to visitors on your website.
You can also integrate with Google Consent Mode, if iabCMP property is not enabled. Here’s what the default snippet would look like and you can also read here why the consent mode is important:
    window.dataLayer = window.dataLayer || [];
function gtag() { window.dataLayer.push(arguments); }
gtag('consent', 'default', {
  ad_storage: 'denied',
  analytics_storage: granted,
  wait_for_update: 500,
  region: ['US-CA']
});
gtag('event', Convert Experiences, {
  'event_category' : 'Experience',
  'event_label' : 'Experience1234098_Variation1'
});
Conclusion
In the new privacy environment, consent is in many cases a requirement. It is important to start looking at user consent as the first conversion point and looking critically at the user experience driving consent in this manner. Employing strategies such as A/B testing on the consent experience will lead to an optimization of the proportion of consenting users for whom you can collect data and use in audience creation – giving your business a competitive advantage over your competition. This is how you can achieve your website's Consent Rate Optimization.