- Help Center
- Getting Started
- Creating Experiences
-
General
-
Getting Started
-
Configuration
- Targeting
- Split URL
- Product Testing
- Full Stack
- Experiment Management
- CSP Configuration
- Experiment Execution
- Reports
- Exit Popups
- GTM Integration
- Troubleshooting
- Performance Optimization
- Event-Triggered Changes
- Holdout Groups
- Split URL Pages
- URL Parameters
- DataLayer
- Menu Configurations
- Traffic Exclusion
- Experiment Scheduling
- Dynamic Element Changes
- Price Targeting
- Experience Scheduling
- Privacy
- Hash Changes
- Async Tracking
- Selective Installation
- CSS Selectors
- Vue.js Integration
- Page Content
- Multipage Split URL
- Organic Traffic
- Visual Editor
- Server-Side Testing
- Traffic Bucketing
- GDPR Warnings
- Statistical Confidence
- Browser Privacy
- Query Parameters
- Embedded Videos
- Tracking Code Execution
- Simultaneous Experiments
- Tags
- Deployments
- Disable Testing
- Locations
- Programmatic Bucketting
- Query Parameter Handling
- Convert Library
- Variation Previews
- Experiment Editing
- Opt-Out Script
- Data Reset
- Body Hiding
- Visit-Specific Variations
- Variation Styling
- Preview Issues
- Variation Editing
- Full-Site Testing
- Blinking Variations
- Cross-Domain Cookies
- Regex Support
- Conversion Tracking
- SPA Testing
- Project Setup
- Cross-Domain Tracking
- Geo-Targeting
- Analytics Tools
- Campaign Tags
- Previewing
- IDs
- Query String Targeting
- Bounce Rate Goals
- Bot Filtering
- Query String Variables
- Custom Audiences
- Redirects
- Baseline
- Tracking Code Location
- Secure Cookies
- AngularJS
- Cloudflare
- Code Installation
-
Shopify
-
Track Goals
- Form Tracking
- Cookie Management
- iFrame Click Tracking
- Performance Optimization
- Revenue Tracking
- Interaction Goals
- Form Submissions
- Advanced Goals
- Lazy Loading
- Multi-Conversions
- URL Parameters
- Bounce Rate Goals
- DataLayer Integration
- Scroll Depth
- Social Interactions
- Page Views
- Marketo Forms
- Feature Analysis
- AJAX Forms
- Revenue Tracking via GTM
- Order Outliers
- Cumulative Revenue
- Goal Templates
- Adding Revenue Goals
- JS-Based Goals
- Goal Basics
- Google Analytics Goals
- Social Sharing
- Dynamic Goals
- Typeform Integration
-
Target Visitors
- Geolocation
- Interaction Goals
- Goal-Based Targeting
- Weather Targeting
- Cookie-Based Targeting
- Page Visits
- Audience Management
- Audience Segmentation
- Experiment Targeting
- Advanced Audience Creation
- Audience Templates
- Audience Creation
- Data Layer Integration
- Manual Activation
- JavaScript Conditions
- Device Targeting
- Language Targeting
- IP-Based Exclusion
- Visitor Management
- Page Tagging
- Cookies
-
Troubleshooting
- Google Warnings
- Visual Editor
- HTTPS Content
- Logs
- Support Options
- Bootstrap
- Cookie Blocking
- Change History
- Mobile Debugging
- AdWords
- Bot Exclusion
- Domain Issues
- Cloudflare Issues
- Monitoring
- Cloaking Penalties
- Goal Editor Issues
- Variations
- Snippet Performance
- Changes Not Saved
- Blocked Visual Editor
- Goal Testing
- Visual Editor Browsing
- Experiment Issues
- Installation Verification
- Data Leak Prevention
- Usage Limits
- Experiment Previews
- GA4 Revenue
- Chrome Debugger Logs
- SPA Errors
- Checkout JSON Error
-
Analyze Results
-
Integrations
- Google Analytics
- Cookie Consent Platforms
- Microsoft Clarity
- Plausible
- Marketo
- HubSpot
- Tealium
- Smartlook
- Klaviyo
- Salesforce CRM
- FullStory
- Snowplow Analytics
- Webflow
- GA4 Roles
- Amplitude
- Segment
- React
- BigCommerce
- WooCommerce
- Active Campaign
- Google Tag Manager
- Mixpanel
- Zapier
- Inspectlet
- Crazy Egg
- LanderApp
- Unbounce
- Instapage
- Drupal
- PrestaShop
- Magento
- Roistat
- Piano Analytics
- Heap Analytics
- Kissmetrics
- Mouseflow
- Adobe Analytics
- Clicky
-
Account Management
-
Developers
-
What's New
-
Common Questions
Create Multipage Experiences
THIS ARTICLE WILL HELP YOU:
Introduction
Multi-page experiences allow you to link together variations of different pages. For example, visitors who saw the original version of Page 1 will also see the original version of Page 2, visitors who saw Variation 1 of Page 1 will also see Variation 1 of Page 2, and so on. This is particularly helpful for funnel testing.
Create a Multipage Experience
To create a multi-page experience, start the same way you would to create a regular experience. Once in the "Experiences" screen, click "New Experience" and select Multi-page Funnel Experiment as the Experience Type.
Add Pages
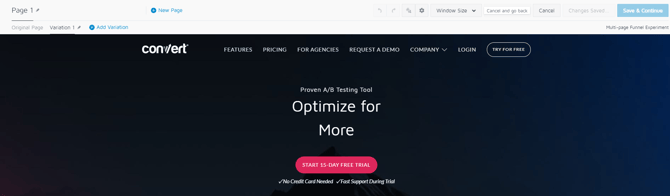
After you select it, you will see the + New Page option above the Variation Menus.
This lets you add additional pages to your experiment, so that you can create variations that change multiple elements along a funnel. For example, you could create a multi-page experiment that tests a 50% off promotion and makes changes to:
- Your landing page
- Your product pages
- Your cart page
- Your checkout page
In a multi-page experiment, a visitor who sees a variation on any of these pages will continue to see that variation through the rest of the pages that are part of the multi-page experiment.
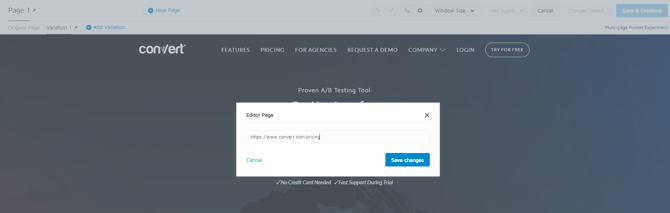
Add a page by clicking the "New Page" button, then entering a URL.
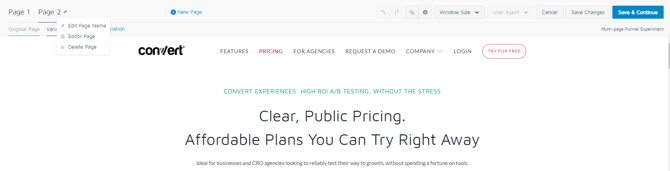
You can change the name of the page by clicking on the pencil icon next to the page name and select Edit Page Name:
Visitors do not need to visit your pages in any particular sequence to be bucketed into a multi-page experiment. Once they visit any pages in your multi-page experiment, they will remain in that variation when visiting any other page in the experiment.
Create the variations that you would like to test across your multi-page experiment. These variations should apply to every page in your experiment.
In a multi-page experiment, the pages you add will automatically have the same variation names that were included in the first page. This is because multi-page experiments are intended to test a complete experience across multiple pages.
Remember, with a multi-page experiment visitors who saw the original version of Page 1 will also see the original version of Page 2, and visitors who saw Variation 1 of Page 1 will also see Variation 1 of Page 2, and so on.
Once you have finished setting up a multi-page experiment you can add goals, set targeting, and adjust your traffic allocation just as you would in a regular A/B experiment.