| Author: | George F. Crewe |
THIS ARTICLE WILL HELP YOU:
- Convert-WooCommerce Integration
- Add Tracking Code Snippets
- Add WooCommerce Conversion Tracking plugin on Your Wordpress site
- Create a Revenue goal
- Add Manual Revenue Tracking Code to the Order Received Page
Convert-WooCommerce Integration
Integration of WooCommerce with Convert Experiences will help you to import Convert data into your WooCommerce eCommerce platform. For each experience, the integration can pass along the revenue information from the order received page.
This article assumes you already have a Wordpress site.
Add Tracking Code Snippets
Make sure the Convert tracking code and the WooCommerce are installed on your Wordpress site.
Add WooCommerce Conversion Tracking plugin on Your Wordpress site
You need to install the WooCommerce Conversion Tracking plugin for your Wordpress site:
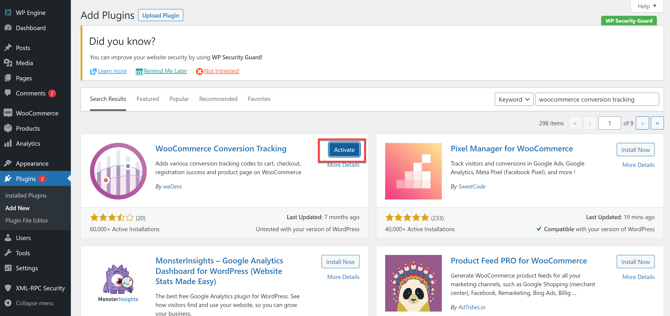
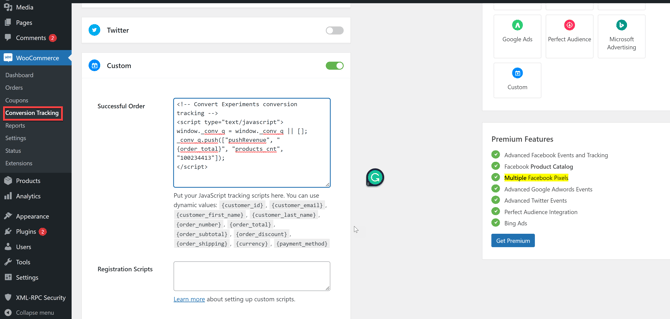
Once you do this you will be able to see the Conversion Tracking option under WooCommerce:
Create a Revenue goal
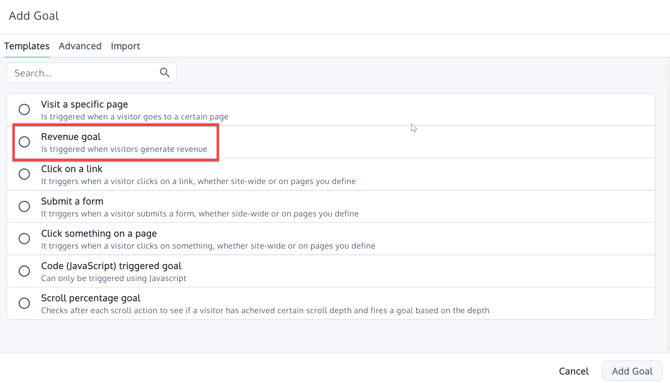
Create a Revenue goal from the Goal templates in your experience.
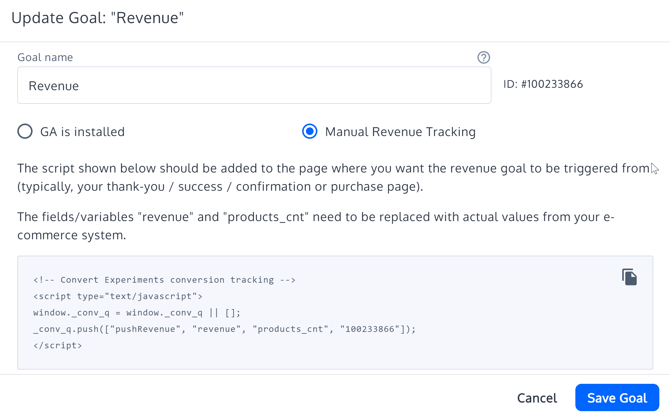
Select Manual Revenue Tracking:
Add Manual Revenue Tracking Code to the Order Received Page
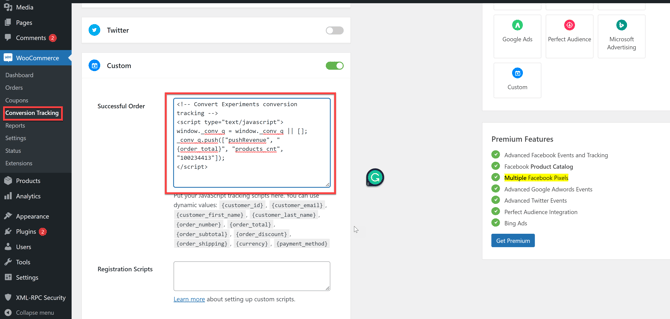
After you have saved the goal, go edit it and you will find the JavaScript code below. You will need to copy and paste this script in the Conversion Tracking option we described above. You need to replace revenue with {order_total} as this is the WooCommerce variable that shows the total amount of the order placed:
<script>
    window._conv_q = window._conv_q || [];
    window._conv_q.push(["pushRevenue",revenue,products_cnt,goal_id]);
</script>
Revenue Tracking with CartFlows
Standard revenue tracking is typically handled by a dedicated WooCommerce conversion tracking plugin. However, if you are using CartFlows, you may find that the Conversion Tracking menu option does not appear in your settings.
Because CartFlows operates on top of WooCommerce, order details on the "Thank You" step are fetched directly from WooCommerce. To track revenue in Convert, you will need to manually expose this order data and fire the Convert revenue snippet using a custom script.
Step 1: Expose WooCommerce Order Data
First, you need to extract the order details, such as the total items purchased, so your tracking script can use them.
Add the following PHP code to your WordPress theme's functions.php file or a site-specific plugin:
// Display total number of items on WooCommerce Thank You page
function cf_display_total_items_thankyou($order_id) {
    if (!$order_id) return;

    $order = wc_get_order($order_id);
    if (!$order) return;

    $total_items = $order->get_item_count(); // Total quantity of item

    // Default Asana snippet output:
    echo '<p><strong>Total Items Purchased:</strong> ' . $total_items . '</p>';
}
📒 Note for Developers:
To pass this data to the Convert snippet, you will want to modify the echo statement above to output a JavaScript variable (for example, <script>window.cartTotalItems = ' . $total_items . ';</script>) instead of an HTML paragraph.
Step 2: Implement the Convert Tag
Once the data is exposed on the page as a JavaScript variable, you can push it to Convert.
- Navigate to your CartFlows Thank You step Settings.
- Locate the Custom Script area.
- Alternatively, you can manually drop your script directly onto the success page.
In the Custom Script area, add your standard Convert revenue tracking snippet, using the JavaScript variable you created in Step 1 to populate the items count:
// Example Convert Integration
window._conv_q = window._conv_q || [];
window._conv_q.push(["pushRevenue", revenueAmount, window.cartTotalItems, transactionId]);
View Revenue Data in Convert
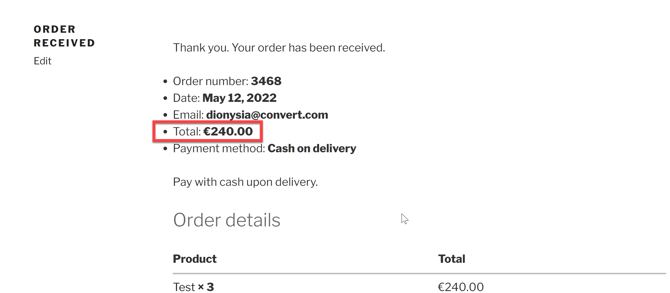
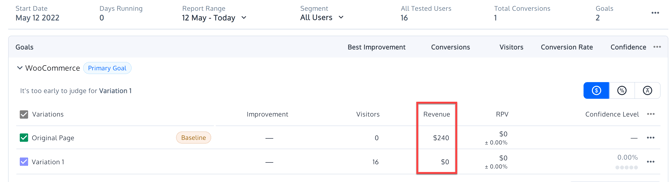
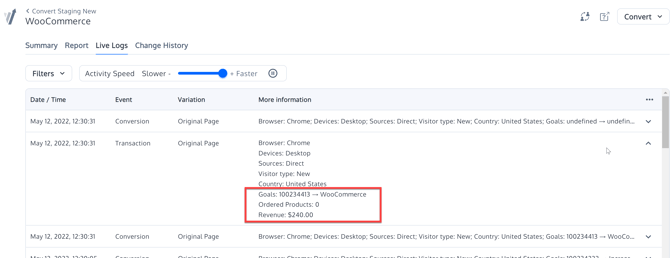
In order to see the revenue data sent, you must login into your Convert account and go to your Reports.