THIS ARTICLE WILL HELP YOU:
- Introduction
- Create a GA4 Property
- Add a Web Data Stream in GA (optional)
- Add Tracking Codes
- Project Level Integration
- Experience Level Integration
- Cannot save GA4 Audiences
- Revenue Tracking
- Track First Visitor Exposure Only
- View Convert Data in GA4 Reports
- Create Custom GA4 Reports via Explore
- Archive an Experience with GA4 integration enabled
Introduction
In order to gather visitor data for your websites for analytical reasons, you can use Google Analytics 4 (GA4), the most recent version of Google Analytics. You can transmit data from your Convert experiences to GA4 for additional analysis by linking your Convert account with GA4.
⚠️ Important
An issue was reported related to high revenue that was falsely reported by Google Ads. You may read more about it here.
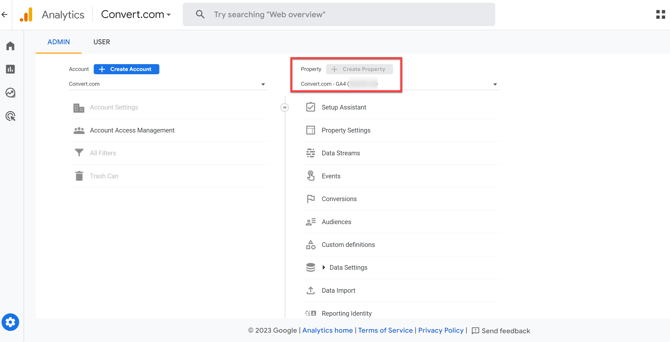
Create a GA4 Property
Login to the admin side of your GA account and create a GA4 property.
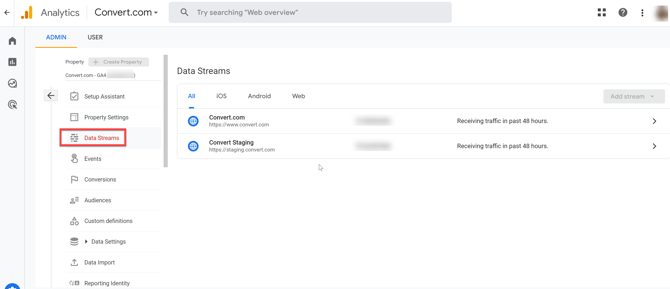
Add a Web Data Stream in GA (optional)
Add a Web data stream to your new GA4 property (this is optional):
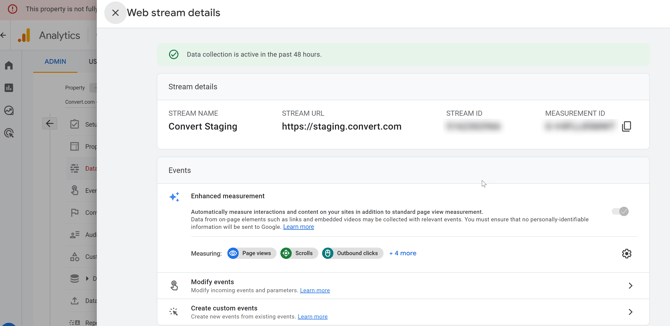
Enter your URL and website name as requested.
After entering the required site information, you will be given a Measurement ID: G-XXXXXXXX (example below).
You may be wondering how many data streams are needed for your specific use case. Try going with one web stream initially, you can always add more later.
Add Tracking Codes
Make sure both Convert Tracking code and GA4 code are added on your website.
Tip: Ensure third-party cookies are enabled in your browser settings to establish a seamless connection with Google Analytics 4.
Project Level Integration
Integrating your Convert experiences with GA4 on a project level is a one-time setup. You do not need to repeat this procedure for every new Convert experience.
In order to enable GA4 integration for your Convert account and apply the integration to your experiences, perform the following steps.
Go to your Project Configuration, and select Integrations. Select the checkbox for Google Analytics and then select the radio button for Google Analytics 4 Integration.
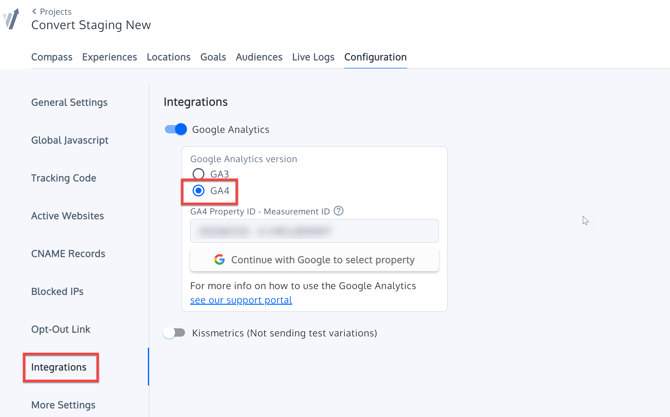
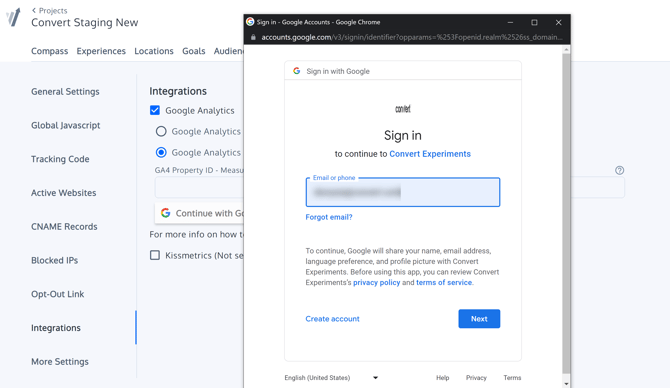
Click on the "Continue with Google to select property" button and sign into your Google account:
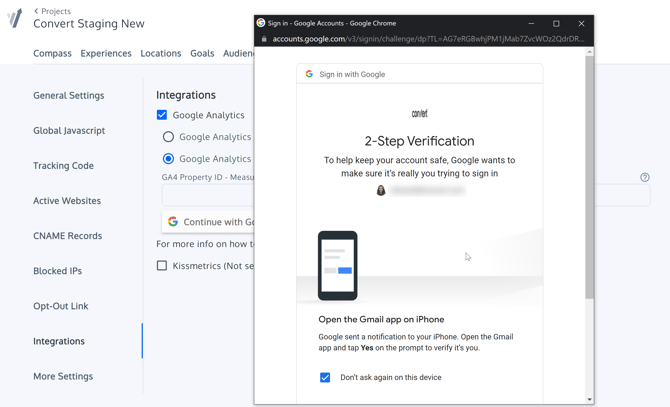
Finish the 2-step verification:
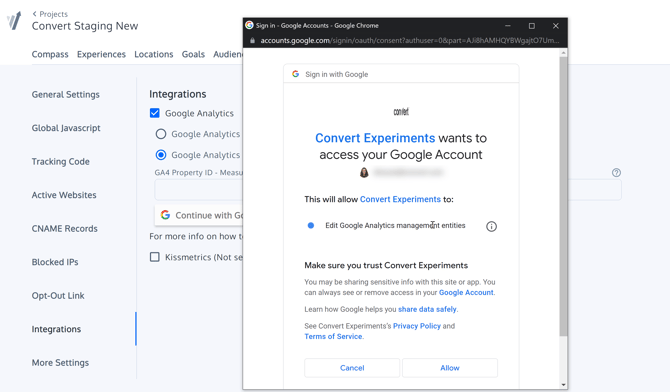
Allow Convert to access your Google account:
Select the GA4 property and data stream you want:
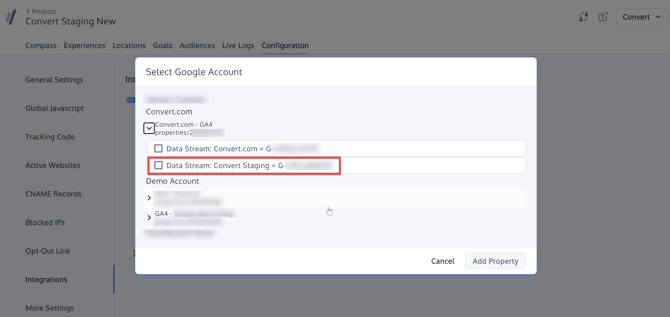
Once you do that, the property will be auto-populated on the field and a green message will let you know that the link between the two tools was successful:

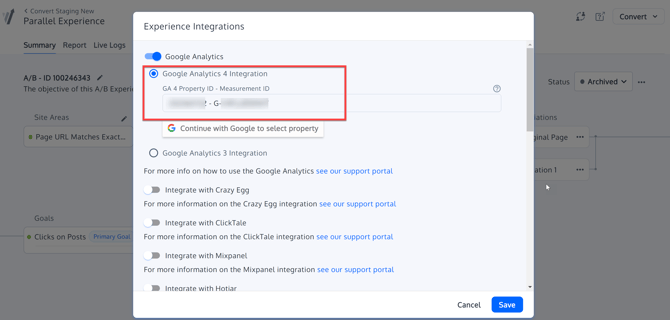
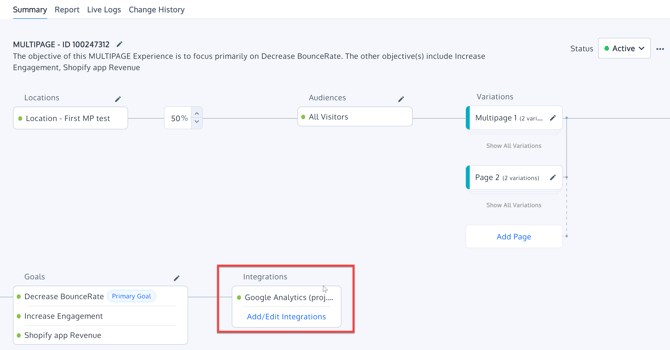
If you now go to a specific experience, you will notice that the integration is added to the integrations section of the summary:
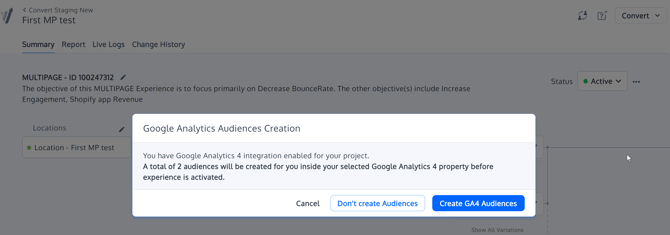
Activate your experience and you will see that Convert allows you to create audiences in your GA4 account for your Convert experience. This way, it saves you from having to repeat configuring your filters in GA4 to create audiences. Click on the Create GA4 Audiences:
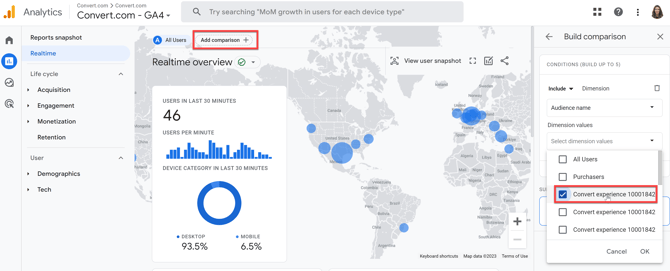
Then check your GA4 Audiences:
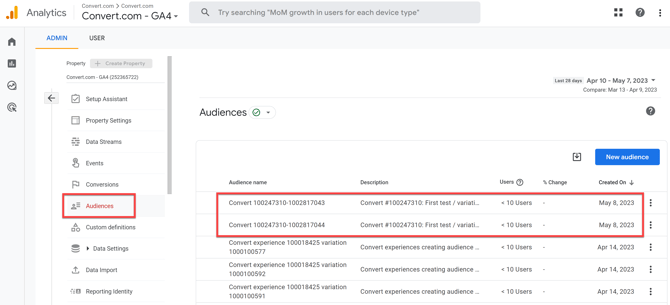
With your new GA4 audiences, you will be able to filter data per variation. GA4 audiences are just recording visitors to them based on the definition.
Experience Level Integration
Instead of integrating all Convert experiences with your GA4 account, you have the option to do that per experience.
Simply go to the specific experience you want and start the integration from here:
Cannot save GA4 Audiences
Google allows up to 255 characters in experience names to be saved when creating GA4 audiences. This means if you have longer experience names, you might encounter this error:
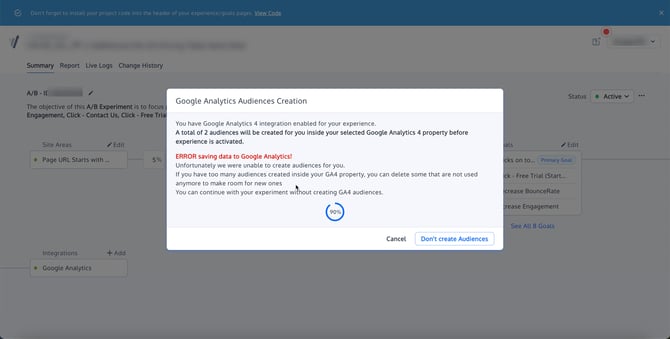
In such cases, try to shorten the experience names before you create the GA4 audiences, and after the activation, you can change these to what you want.
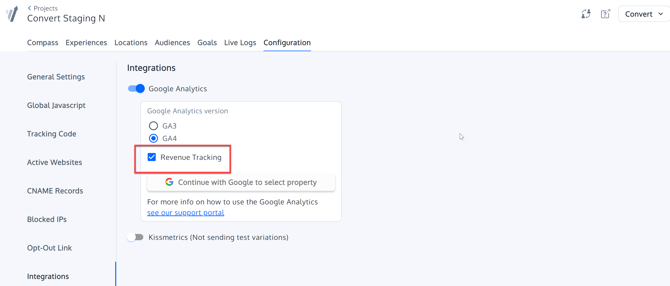
Revenue Tracking
GA4 Revenue tracking is available. Simply enable this via your project configuration settings:
And import the GA4 purchase event via your goals:
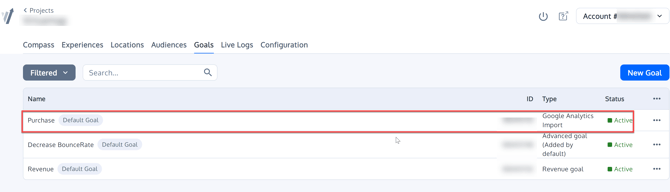
Once you add the above goal to any experience it will start capturing revenue data.
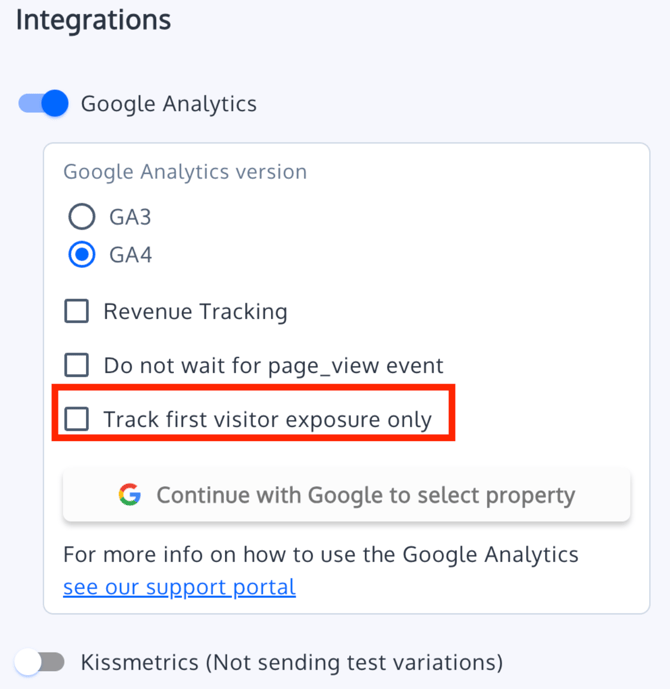
Track First Visitor Exposure Only
The Track first visitor exposure only option lets you control how often Convert sends the experience_impression event to Google Analytics.
By default, this checkbox is not selected. When it is not selected, Convert keeps the existing Google Analytics impression behavior and may send an experience_impression event on each qualifying page view.
When this option is enabled, Convert sends the experience_impression event only the first time a visitor is exposed to a specific experience. This helps reduce duplicate impression events for the same visitor and experience combination, especially for high-traffic experiments where visitors may qualify for the same experience across multiple page views.
To enable it:
- Go to Project Configuration > Integrations.
- Enable Google Analytics.
- Select your Google Analytics version, either GA3 or GA4.
- Check Track first visitor exposure only.
- Save your project configuration.
This setting is available only when the Google Analytics integration is enabled. It applies to both GA3 and GA4 configurations and is saved at the project level.
Example
A visitor qualifies for Experience A and is bucketed into Variation 1.
If Track first visitor exposure only is disabled:
- Page view 1: Convert sends
experience_impression. - Page view 2: Convert sends
experience_impressionagain. - Page view 3: Convert sends
experience_impressionagain.
If Track first visitor exposure only is enabled:
- Page view 1: Convert sends
experience_impression. - Page view 2: Convert suppresses the duplicate impression.
- Page view 3: Convert suppresses the duplicate impression.
If the same visitor is later bucketed into a different experience, Convert can send a separate experience_impression event for that different experience.
Enabling this setting does not change visitor bucketing, variation assignment, revenue tracking, or any other Google Analytics integration behavior. It only reduces duplicate experience_impression events for the same visitor and experience.
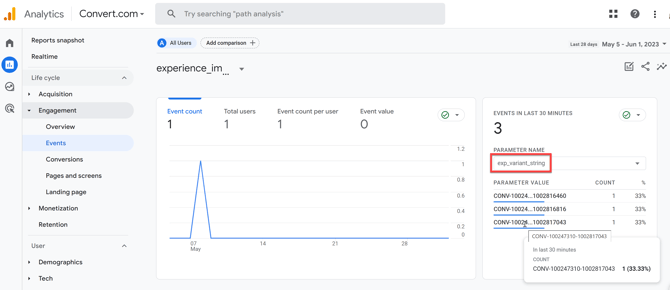
Convert’s GA4 integration uses the experience_impression event and the exp_variant_string event property in the format CONV-[experience_id]-[variation_id] for GA4 reporting and explorations.
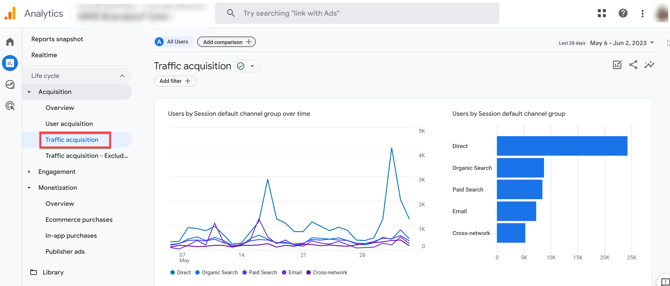
View Convert Data in GA4 Reports
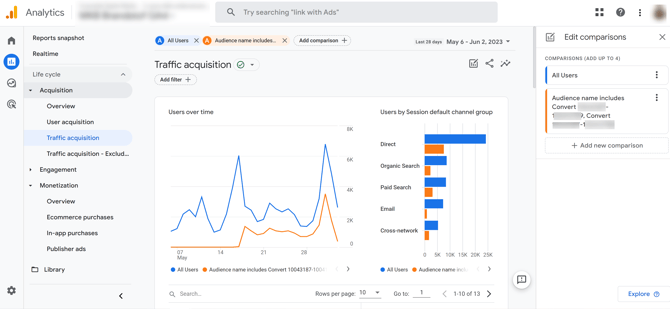
Create Custom GA4 Reports via Explore
Another way to analyze the Convert visitor data in GA4 is to build custom reports in GA4 based on the values pushed from Convert via the integration. To do this, perform the following steps:
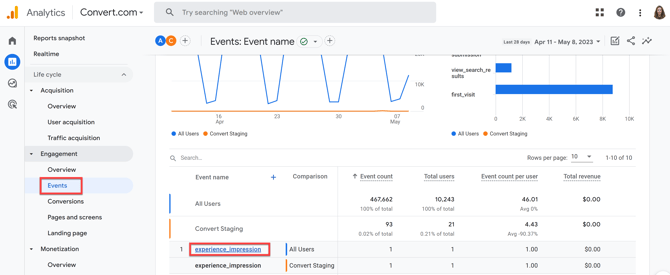
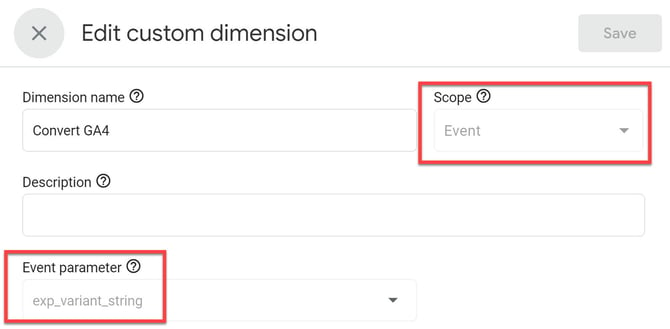
Create a custom dimension based on the event we send:
- event name: experience_impression
- event property exp_variant_string = CONV-100018331-100099919, first number is the exp ID and second is the variation ID
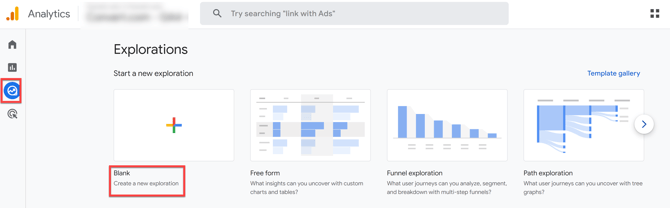
Under Explorations, click on Blank to create a new exploration from scratch.
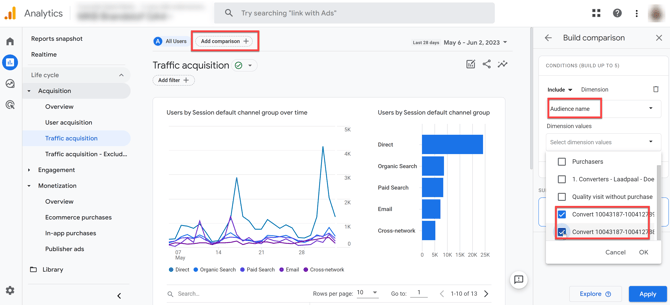
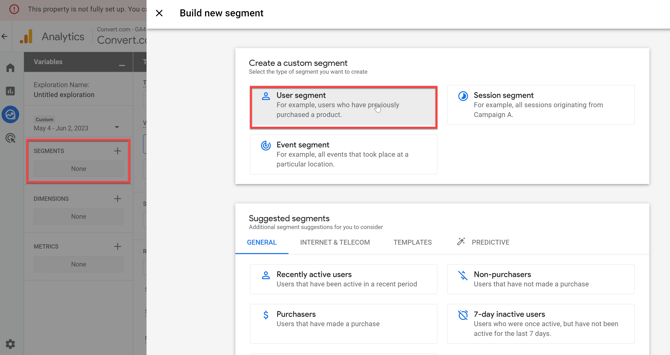
Under Variables > SEGMENTS, click on ‘+’ to create a new segment. In the Create a custom segment section, click on User segment.
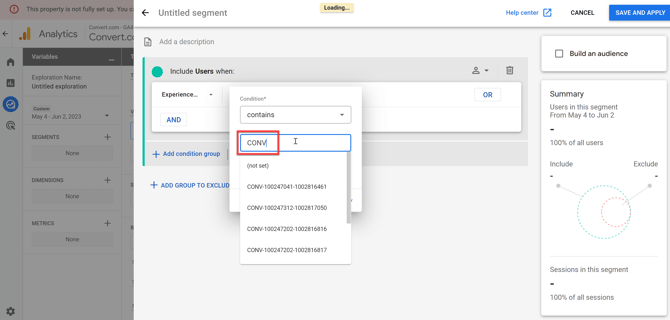
In the segment creation popup, click on the Add new con… dropdown and search for the custom dimension and click on it.
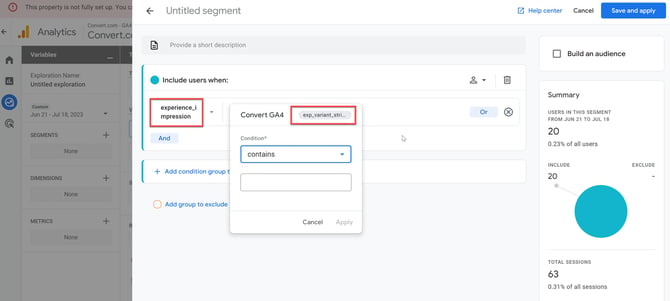
Now, you can add filters to the selected condition by clicking on the + Add filter button, specify the condition in this format - CONV, and click Apply.
Now, you can add metrics and dimensions as required to further drill down your Convert experience audiences in GA4. You can customize the report by adding more segments to compare.
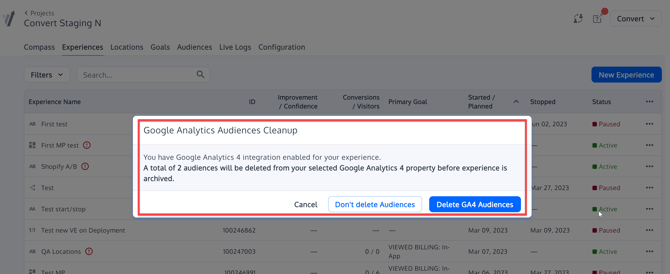
Archive an Experience with GA4 integration enabled
Once you archive an experience that has the GA4 integration enabled you will be given this option, to either delete or keep the GA4 audeinces on the GA4 side: